20+ Years Experience
Specialist Epoxy Resin Flooring
Have you ever considered the benefits of painting your garage floor? A well-painted garage floor not only enhances the overall appearance of your garage, but also provides a durable, easy-to-clean surface that can withstand heavy use.
In this guide, we’ll walk you through the process of selecting the right garage floor paint, application tips, customisation options, and common mistakes to avoid. Get ready to transform your garage into a space you’ll be proud to show off!
Selecting the right garage floor paint is essential for a long-lasting, durable finish. The two primary types of garage floor paint are epoxy and polyurethane, each with its own set of advantages and disadvantages.
Epoxy paints are highly resilient and resistant to chemicals, making them one of the best options for garage floors. On the other hand, polyurethane paints are more supple and resistant to wear, making them suitable for both concrete floors, steel and wooden floors.
Garage floor paints also come in solvent-based and water-based options. Solvent-based paints offer enhanced durability and scratch-resistance compared to normal paint but have a more potent odor and require increased ventilation during application.
Water-based paints, meanwhile, are simpler to clean up and possess a diminished odor, making them more user-friendly.
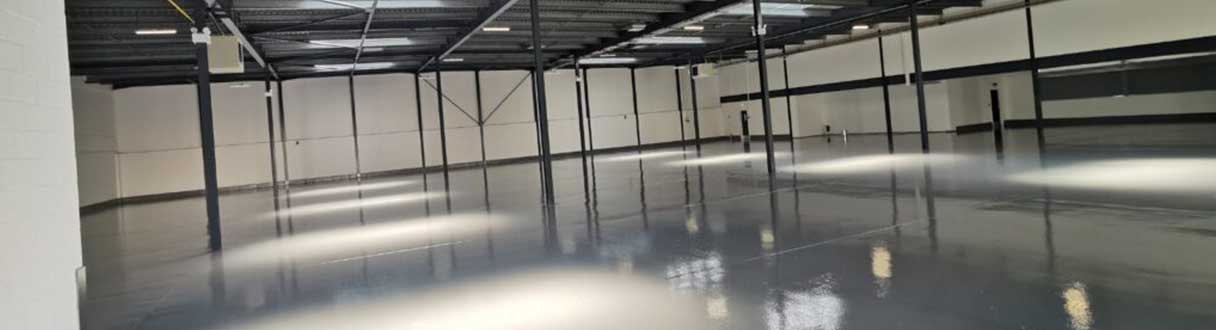
Epoxy garage floor paint is a two-component paint that provides excellent resistance to chemicals, heat, and abrasion.
This makes it one of the best garage floor paint options for concrete surfaces, as it can withstand heavy traffic and resist oil and grease stains.
To achieve optimal results, epoxy paint typically requires two coats, with the first coat with a touch-dry time of 4 hours and a complete cure time of four hours to a few days.
On the other hand, polyurethane garage floor paint is a single-component paint that is more flexible and wear-resistant. It is suitable for both concrete and wooden floors, as well as other surfaces like metal and stone.
Polyurethane floor paints can often come in a range of colours and finishes, allowing you to customise your garage floor to match your personal style. However, they may not provide the same level of chemical resistance as epoxy paints.
When choosing a garage floor paint, it’s essential to consider whether a solvent-based or water-based formula is best for your needs.
Solvent-based garage floor paints are typically more durable and scratch-resistant than their water-based counterparts, making them a popular choice for heavy-duty applications. However, they have a stronger odor and require more ventilation during application.
Water-based garage floor paints, on the other hand, are easier to clean up and have a milder odor, making them more user-friendly.
They still provide a durable and protective coating for concrete floors, but may not be as resistant to heavy traffic and chemical spills as solvent-based concrete floor paints.
Ultimately, the choice between solvent- and water-based garage floor paint will depend on your specific needs and preferences.
Proper application of garage floor paint is crucial for achieving a long-lasting, durable finish on garage floors. In this section, we’ll discuss the importance of surface preparation.
The painting process is an important step in the process. It’s important to use the right type of paint and to apply it correctly.
Maintenance tips are also important for getting the most out of your newly painted garage floor. Regular cleaning and sealing can help keep the surface clean.
Preparing your garage floor for painting is essential for a successful outcome. First, clean the floor thoroughly using a detergent, such as washing up liquid, to remove any dirt, grease, and debris. If there are any cracks or holes in the concrete, repair them using a suitable filler. Once the surface is ready, you can apply the best garage floor paint, for a durable and attractive finish.
Next, apply a concrete and masonry cleaner and etcher to the concrete floor surface, whether it’s stone floors or any other tile red other type, to remove any remaining stains and improve the paint’s adhesion. Be sure to follow the manufacturer’s instructions, and rinse the floor thoroughly before allowing it to dry completely.
Proper surface preparation is crucial for ensuring that the paint adheres optimally and provides a long-lasting, durable, smooth finish.
The painting process begins with selecting the right tools for the job. A roller is typically the best choice for applying garage floor paint, as it provides even coverage and minimises the risk of brush marks. A cutting-in brush can be used to paint around the edges of the floor and any obstacles, such as support columns.
Apply multiple layers of paint, allowing each coat to completely dry and for the recommended time before applying the next coat. This is particularly important for epoxy and polyurethane paints, which require a specific curing time for optimal performance.
Be sure to follow the manufacturer’s instructions regarding drying times, and allow the final coat to cure fully before subjecting the floor to heavy, high traffic areas.
Regular maintenance is key to prolonging the life of your painted garage floor. To clean the floor, use a solution of ammonia and hot water, which is effective at removing dirt and grease without harming the paint. Avoid using harsh chemicals that could damage the paint.
Spills and stains should be cleaned up promptly to prevent them from becoming permanent. If your painted garage floor becomes damaged, consider touching up the affected area with a fresh, second coat, of paint to maintain its appearance and protective qualities.
Customising your garage floor paint is a great way to add a personal touch to your space. In this section, we’ll explore options for creating an anti-slip surface and mixing colours and finishes, such as light grey, to achieve a unique and visually appealing result.
There are a variety of anti-slip additives available, such as sand, rubber granules oil grease, and grit. These can be added to the paint to protect and create a textured surface.
An anti-slip surface is not only visually appealing, but also provides an added safety benefit by reducing the risk of slips and falls. To create an anti-slip surface, start by cleaning the garage floor and applying a primer. Next, apply a top coat of paint containing an anti-slip additive, which will provide a textured finish that improves traction for both vehicles and pedestrians.
There are several products on the market that can help you create an anti-slip surface, such as Resincoat’s anti-slip epoxy floor coating. These products are specially formulated and specifically designed to provide a durable, slip-resistant finish that can withstand heavy traffic and resist oil and grease stains.
Mixing different colours and finishes can help you achieve a custom look for your garage floor. To mix various colours and finishes, use a plastic mixing bucket and add the desired range of colours and finishes to the bucket. Mix them together thoroughly to ensure a consistent result.
Consider experimenting with different combinations of colours and finishes to find the perfect look for your garage. For some concrete floor paints for example, you can use a base colour and then add speckles or flakes for a unique, eye-catching design. Alternatively, you can alter the colour of epoxy garage floor paint to create a custom shade that complements your existing decor.
To ensure a successful car and garage floor painting project, it’s important to avoid some common mistakes. In this section, we’ll discuss the pitfalls of insufficient surface preparation and inadequate ventilation, and how to avoid them.
Surface preparation is key to a successful floor paint job. Make sure to clean the floor thoroughly and remove any dirt, grease, or other debris. If the floor is not properly installed, the floor is not properly installed.
One of the most common mistakes when painting a garage floor is inadequate surface preparation. Failing to properly prepare the surface may result in paint not adhering optimally, leading to peeling and chipping. To avoid this, make sure to clean, repair any cracks, and etch the surface before applying the paint.
Follow the surface preparation tips outlined in Section 3.1, including cleaning and degreasing the floor, repairing cracks and holes, and applying a concrete and masonry cleaner and etcher. By taking the time to properly prepare your garage floor, you’ll help ensure a long-lasting, durable finish that can withstand heavy traffic and resist oil and grease stains.
Another common mistake when painting a garage floor is not providing enough ventilation. Inadequate ventilation can lead to the paint drying too rapidly, resulting in an unsatisfactory finish. Additionally, poor ventilation can cause the accumulation of dust and hazardous fumes, posing a health hazard.
To ensure proper ventilation during the painting process, open doors and windows to allow for sufficient air circulation. It’s also a good idea to use a fan to help circulate the air and disperse any fumes. Finally, when working with solvent-based paints, wear protective gear such as gloves and masks to prevent inhaling hazardous fumes.
Painting your garage floor is an attractive option to spruce up the space, but the wear and tear of time makes it less than ideal. Plus, with possible health risks, costs, and effort involved, it is not a practical or economical decision in the long run.
2 Feb 2021.
It is highly recommended to seal your concrete garage floor before painting in order to protect the paint job from damage, as well as to allow the paint to adhere properly to new concrete. Therefore, it is essential that you take the time to apply a pva based concrete sealing solution to ensure the best results for your project.
To ensure your garage floor is ready for painting, make sure to vacuum any dust away and apply an appropriate sealer such as Regal Prime and Seal or Two Pack Epoxy Sealer Undercoat. This waterproof seal, will help the paint adhere to the floor and last longer.
For best results, start by roughening up your garage floor so the paint adheres well. Then apply two coats of concrete paint, allowing sufficient drying time between each coat.
Finally, you’ll be left with a professional-looking, freshly painted garage floor.
Epoxy and polyurethane are the two popular types of garage floor paint recommended for concrete floors and surfaces. Both offer durability and longevity, as well as ease of cleaning and resistance to a variety of chemicals, making them an ideal choice for your garage floor.
In conclusion, painting your garage floor can greatly enhance its appearance and provide a durable, easy-to-clean surface that can withstand heavy use.
By choosing the right garage floor paint, following proper application techniques, and avoiding common mistakes, you can achieve a professional-looking finish that will last for years to come. So roll up your sleeves and get ready to transform your garage into a space you’ll be proud to show off!
We Aim To Reply To All Enquiries With-in 24-Hours