20+ Years Experience
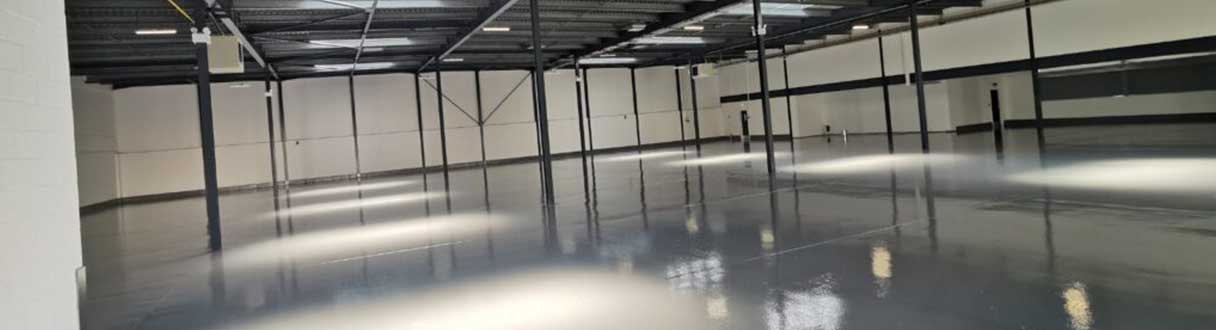
Specialist Epoxy Resin Flooring
Are you tired of uneven floors and seeking a solution that can transform your space into a smooth, level surface? Look no further! Self-levelling flooring is the answer to your woes.
In this comprehensive guide, we’ll walk you through the ins and outs of self-levelling flooring, including the materials, benefits, and techniques to ensure a flawless finish. Say goodbye to lumpy, bumpy floors and hello to a sleek, even surface that’s both functional and visually appealing.
The first step towards a perfectly level floor is understanding the concept of self levelling flooring. It is a technique that involves using a self levelling compound to create a smooth and even surface.
This solution is ideal for dealing with uneven floors, which can be a common issue in older homes or during renovation projects.
The self levelling screed not only provides a level surface, but also offers numerous benefits, such as compatibility with underfloor heating systems and a visually appealing finish.
There are various types of self levelling compounds available in the market, each with its specific characteristics and uses.
Cement-based and epoxy-based compounds are the most common, with cement-based compounds being cost-effective and sturdy, while epoxy-based compounds offer excellent durability, water and chemical resistance, and a seamless finish.
Cement-based self levelling compounds, such as deep base floor levelling compound and 708 Febflor Universal floor-levelling compound, are designed for various applications, from efficiently raising the floor to leveling out uneven floors and screeds before installing floor coverings like ceramic tiles, wood block flooring, or carpet.
On the other hand, epoxy-based self levelling compounds like Resincoat Epoflow Self Leveling Screed are known for their exceptional durability and resistance to water and chemicals. They are suitable for creating a smooth and level surface prior to installing new flooring.
These compounds are often used in commercial and industrial settings, where a high level of wear resistance is required.
Aside from providing a smooth and even surface, self levelling flooring offers numerous advantages. It expedites installation, repairs cracks and imperfections in the subfloor, and diminishes damage to floors and associated repair costs.
Additionally, it is water-resistant and inhibits the growth of microorganisms, ensuring a clean and hygienic surface.
A shorter installation time frame is another significant advantage of self levelling flooring. This means that the floor is available for use sooner, reducing the amount of time the area is unavailable and minimizing labor and material costs.
Furthermore, repairing cracks and imperfections in the subfloor ensures a level and even floor, reducing the likelihood of tripping and slipping, and preventing further damage to the floor.
Before you dive into the application of self levelling compounds, it’s crucial to prepare your floor. Proper preparation guarantees that the self levelling compound adheres well to the surface and yields the desired outcome. The two main steps in preparing your floor for self- levelling products are removing old flooring and priming the surface.
Removing old flooring materials, such as existing tiles or carpet, is essential for a clean and level surface. Once the old flooring is removed, you must clean, dry, and free the surface from any contaminants.
Priming the surface is a critical step to ensure optimal results. The primer not only helps the self levelling compound adhere to the surface, but also prevents overly rapid drying, allowing for a seamless finish.
To remove the existing flooring, you must first loosen the flooring and then pull up the strips to expose the glue. Utilize a paint scraper or a crowbar to remove any leftover glue or other materials from the floor. Also, ensure that any screws or nails are removed to create a smooth and even surface for the self levelling compound to adhere to.
After removing the old flooring, thoroughly clean and dry the surface. This step is crucial for ensuring that the self levelling compound adheres properly and that no contaminants interfere with the leveling process. A clean, dry surface is the foundation for a successful self levelling flooring installation.
Priming the surface is a key step in the floor preparation process. Utilizing a floor levelling acrylic primer before applying floor screed, such as self-levelling screed, ensures that the compound adheres well to both absorbent and non-absorbent subfloors. Priming also prevents the compound from drying too quickly, allowing for a smooth and seamless finish.
There are various types of primers available for different surface conditions. Resincoat Deep Penetrating Epoxy Primer is a great choice when treating damaged, friable or weak floors. It also provides deep penetration to the substrate in order to form a protective barrier.
Resincoat Epoxy Primer, on the other hand, makes an excellent base coat for surfaces prior to painting, ensuring optimal adhesion of the topcoat.
Now that your floor is prepped and primed, it’s time to apply the self levelling compound. There are two main application techniques for self levelling flooring: using a steel trowel and utilizing a spiked roller. Both methods are effective in spreading the compound evenly across the floor, ensuring a smooth and level surface.
While using a steel trowel is the most common method for applying self levelling compounds, a spiked roller offers additional benefits, such as releasing trapped air bubbles and facilitating the levelling process. Whichever method you choose, it’s essential to follow the manufacturer’s instructions for the specific self levelling compound you’re using.
To achieve optimal results when utilizing a steel trowel for self levelling, it’s essential to pour the mixture onto the floor from the farthest part of the room and work backward.
This method ensures even distribution of mixing the compound across the floor without accidentally stepping in the freshly poured mixture.
Utilize the smooth edge of the steel trowel to spread the self levelling compound evenly. The recommended thickness for Resincoat Epoflow Self Leveling Screed, for instance, is between 2mm-4mm.
Always refer to the manufacturer’s instructions for the specific product you’re using for the correct thickness and application method.
A spiked roller is an invaluable tool for achieving a smooth and even surface when applying self levelling compounds. It is designed to release trapped air bubbles and facilitate the levelling process, ensuring a seamless finish.
To use a spiked roller effectively, roll it over the surface in a uniform and consistent fashion immediately after pouring the self levelling compound. This process releases any trapped dust and air bubbles, preventing them from curing on the surface and compromising the finish of the smooth leveller.
Curing and drying times for self levelling flooring are crucial to take into consideration when planning your project.
These times can vary depending on the type of compound used and environmental conditions. For normal-drying self levelling compounds, a general rule for estimating the drying time is one day per millimetre of thickness.
Keep in mind that rapid set floor levelling compounds, like Resincoat Epoflow Self Leveling Screed, have shorter drying times. In some cases, these compounds can be ready for floor coverings in as little as 45 minutes.
Always refer to the manufacturer’s instructions for the specific drying and curing times of the self levelling compound you’re using.
Once the self levelling compound has cured and dried, it’s essential to wait for the appropriate amount of time before allowing light traffic or installing new flooring materials.
It is recommended to refrain from all traffic on newly-installed self levelling flooring for 24-48 hours. After that, light foot traffic may be permitted, but heavier traffic should be avoided for 5-7 days. Note that drying times may vary depending on environmental conditions.
When it comes to installing new flooring materials on top of self levelling flooring, it’s crucial to wait for the flooring to fully dry and cure. Typically, this takes about 5-7 days. Adhering to this timeline ensures a stable and durable surface for your new flooring installation.
Once your self-levelled floors are installed and ready for use, it’s essential to keep them in top shape to ensure their longevity and appearance. Proper cleaning and maintenance practices go a long way in preserving the quality of your floors, so it’s vital to use the right techniques and products for your specific type of self levelling flooring.
In this section, we’ll share some tips for cleaning and maintaining your self-levelled floors, as well as how to address any damage or cracking that may occur over time. By following these guidelines, you’ll be able to enjoy the benefits of smooth, even floors for years to come.
To ensure the longevity of your self-levelled floors, it’s important to regularly sweep and vacuum the floor to remove dirt and debris.
A damp mop can be used for cleaning, but avoid using excessive amounts of water, as this can damage the walls and flooring material. For stubborn stains, a mild detergent or cleaner can be used.
For specific types of self levelling flooring, such as epoxy or polyurethane, it’s essential to use a mild detergent and warm water for cleaning. Harsh chemicals or abrasive cleaners should be avoided, as they can damage the flooring material.
By following these recommended cleaning practices, you’ll ensure the longevity and appearance of your self-levelled floors.
In the event that your self-levelled floors sustain damage, such as cracks or chips, it’s important to address the issue promptly to prevent further deterioration. A self levelling compound can be used to fill in any cracks or chips present in the floor, restoring the smooth and level surface.
For more severe damage, the damaged area may need to be removed and replaced with a new self levelling compound. In cases like these, it’s essential to prime the base concrete with SBR and follow the manufacturer’s instructions for applying a new self levelling compound.
By promptly addressing any damage to your timber floors, especially self-levelled ones, you’ll maintain their durability and appearance for years to come.
Self-leveling flooring can typically range in thickness from 1/4 inch to up to 5 inches. Most self-leveling compounds should be applied in multiple thin layers rather than one thick layer to achieve optimal results.
This is important to keep in mind when selecting the right self-leveling flooring for one size of your project. The thickness of the flooring should be determined by the amount of leveling needed and the type of flooring.
Yes, you can self level a floor yourself with the proper tools and materials. A self-levelling compound should be used if the floor is out of level by up to 5mm. DIY stores carry these compounds which you can mix and use to even out the surface.
It is necessary to prime the floor before applying a self-leveling compound. Priming helps to ensure that the self-leveler adheres correctly and creates a strong bond between the floor and the underlayment. Proper priming can help ensure a successful installation.
Self levelling flooring provides a range of benefits, including easy installation, long-lasting durability, a smooth and even surface, compatibility with various floor coverings, and water resistance.
These features make it an ideal option for home renovations.
A steel trowel and a spiked roller are essential tools for successful application of self levelling compounds.
Furthermore, proper surface preparation and the use of an appropriate sealant can help achieve the desired results.
In conclusion, self levelling flooring is a versatile and effective solution for transforming uneven floors into smooth, level surfaces.
With the right preparation, application techniques, and maintenance practices, you can enjoy the benefits of self-levelled floors for years to come.
So go ahead and take the plunge – it’s time to bid farewell to those unsightly, uneven floors and embrace the sleek, even surface that self levelling flooring has to offer.
We Aim To Reply To All Enquiries With-in 24-Hours